Painting an old, rusty steel tool chest is a rewarding DIY project that extends its lifespan and protects valuable equipment. This transformation involves meticulous surface preparation, including rust removal, followed by applying a rust-inhibiting primer and a durable topcoat like enamel or epoxy paint. The process typically takes 2-3 days, primarily due to drying and curing times, and can revitalize a rusted relic into a functional, aesthetically pleasing workshop asset.
Essential Safety Measures for Painting Rusty Metal
Working with rusty metal and various chemicals demands a strong emphasis on safety. Before you even think about sanding or painting, gather all the necessary personal protective equipment (PPE). This includes sturdy work gloves to protect your hands from sharp edges, rust, and chemicals, as well as safety glasses or goggles to shield your eyes from debris, paint splatters, and fumes. A respirator with appropriate filters (for dust and organic vapors) is crucial, especially when sanding rust or spraying paint, to prevent inhaling harmful particles and fumes.
Ensure your workspace is well-ventilated, ideally outdoors or in a garage with open doors and fans to circulate air. If working indoors, consider using a fan to draw air away from your work area and outside. Have a fire extinguisher readily available, as many paints and solvents are flammable. Lastly, keep children and pets away from the work area throughout the entire process, from preparation to curing, to avoid accidental exposure to chemicals or wet paint. For expert reviews reviews on this site.
Comprehensive Surface Preparation: The Key to a Lasting Finish
The success of any paint job, especially on rusty metal, hinges entirely on meticulous surface preparation. Skipping this crucial phase will inevitably lead to flaking paint and recurring rust. Begin by completely emptying the tool chest and removing any detachable hardware like handles, latches, or drawer pulls. Label these parts if necessary to ensure easy reassembly.
Next, give the entire chest a thorough cleaning. Use a heavy-duty degreaser or mineral spirits to remove grease, oil, and grime that have accumulated over years of use. For stubborn spots, a stiff brush or abrasive pad can be helpful. Rinse the chest thoroughly with water and allow it to dry completely. Any remaining moisture will compromise adhesion and promote rust. For deep cleaning, a pressure washer can be effective, but ensure ample drying time afterward.
The most critical step is rust removal. For light surface rust, a wire brush, steel wool, or medium-grit sandpaper (around 80-120 grit) attached to an orbital sander can effectively remove loose rust and create a better surface for primer adhesion. For more extensive or deeply pitted rust, a chemical rust remover or converter may be necessary. Rust removers dissolve the rust, while converters chemically change rust into a stable, paintable surface. Always follow the product manufacturer’s instructions carefully when using these chemicals, wearing appropriate PPE, and ensuring good ventilation. After removing rust, sand the entire surface with fine-grit sandpaper (220-320 grit) to smooth out any imperfections and provide a uniform profile for the primer to adhere to. Wipe down the chest with a tack cloth or a clean cloth dampened with denatured alcohol to remove any remaining dust or sanding residue.
Choosing the Right Primer for Rust Protection
A high-quality primer is non-negotiable when painting a steel tool chest, especially one that has battled rust. Primer serves as a vital barrier, inhibiting future rust formation and creating a uniform surface for the topcoat to bond to. For rusty metal, specifically choose a rust-inhibiting primer or an epoxy primer. These primers contain special additives that seal off the metal from oxygen and moisture, effectively preventing rust from creeping back.
Rust-inhibiting primers are formulated to bind directly to clean, bare metal and existing, tightly adhered rust (if a converter was used), providing excellent corrosion resistance. Epoxy primers offer superior adhesion and durability, creating a very hard, non-porous barrier against the elements. Apply the primer in thin, even coats, following the manufacturer’s recommended drying times between coats. Typically, two thin coats are better than one thick coat, as thin coats dry more evenly and reduce the risk of drips or sags. Pay close attention to corners, seams, and any areas that previously had heavy rust, ensuring complete coverage. After the final coat of primer dries, lightly scuff the surface with fine-grit sandpaper (400 grit) to create a mechanical bond for the topcoat, then clean with a tack cloth.
Selecting and Applying the Perfect Topcoat
With the surface meticulously prepared and primed, it’s time for the aesthetic transformation. The choice of topcoat paint will largely dictate the finished look and durability of your tool chest. For steel tool chests, enamel-based paints or epoxy paints are highly recommended due to their exceptional hardness, resistance to chipping, and ability to withstand the harsh conditions of a workshop environment.
Enamel paints, particularly those designed for metal, provide a durable, glossy finish that is easy to clean. They are available in various forms, including brush-on and spray paints. Epoxy paints offer even greater chemical and abrasion resistance, making them ideal for high-use areas, though they can be more challenging to apply and may require specific mixing instructions. For DIY projects, a high-quality enamel spray paint or a rust-protective direct-to-metal (DTM) enamel paint applied with a roller or brush can yield excellent results.
When applying the topcoat, maintain the same principle as with the primer: several thin, even coats are superior to one thick coat. If using spray paint, hold the can about 8-12 inches from the surface and use smooth, overlapping passes. Avoid stopping in the middle of a stroke to prevent uneven coverage. For brush or roller application, work in small sections, maintaining a wet edge to minimize brush marks. Allow adequate drying time between coats as specified by the paint manufacturer, usually several hours. Once the final coat is applied, let the paint cure for at least 24-48 hours, or even longer for epoxy paints, before reattaching hardware or loading the chest. This curing period allows the paint to harden fully, providing maximum durability.
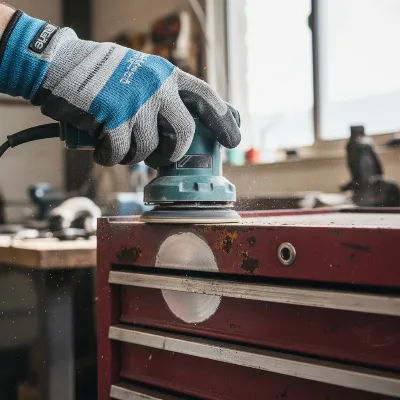 Worker sanding a rusty steel tool chest with an orbital sander for DIY project
Adding a Clear Coat and Finishing Touches
To further enhance the durability and longevity of your freshly painted tool chest, consider applying a clear coat. A clear coat acts as an additional protective layer, guarding against scratches, abrasions, and chemical spills, while also deepening the luster of the chosen color. Automotive clear coats or clear enamel topcoats are excellent choices for this purpose. Apply the clear coat in thin, even layers, just as you did with the primer and color coats, allowing sufficient drying time between applications. This final layer will give your tool chest a professional, factory-like finish.
Once the clear coat has fully cured, carefully reattach all the hardware you removed earlier. Use new hardware if the old pieces were corroded or damaged. Take this opportunity to oil hinges and drawer slides to ensure smooth operation. Finally, consider adding drawer liners to protect the interior of your drawers and cushion your tools. With these finishing touches, your old, rusty steel tool chest will not only look magnificent but will also be better equipped to serve you for many more years to come.
Common Challenges and Troubleshooting
Even with careful planning, DIY painting projects can present unexpected challenges. One common issue is paint drips or runs. This usually occurs when too much paint is applied in one area or the coats are too thick. If caught while wet, you can often smooth it out with a brush. If dry, you’ll need to sand the affected area smooth and reapply thin coats. Poor adhesion or peeling paint is almost always a sign of inadequate surface preparation, especially insufficient rust removal or cleaning. The only true fix is to sand down the compromised area, re-prepare, and repaint.
Uneven finish or brush marks can result from incorrect paint application technique, using the wrong type of brush/roller, or not allowing enough flash-off time between coats. Practicing your technique on scrap metal and ensuring even strokes can help. Rust bleeding through after painting means that some rust was not completely neutralized or removed during preparation. Rust-inhibiting primer helps, but if the underlying rust is too deep or active, it may eventually reappear. In such cases, a more aggressive rust removal method (like sandblasting for severe cases) might be necessary before priming. Patience and attention to detail at each step will mitigate most of these issues.
Frequently Asked Questions
What kind of paint is best for a metal tool chest?
|
Our Picks for the Best Tool Chest in 2026
As an Amazon Associate I earn from qualifying purchases.
|
||
| Num | Product | Action |
|---|---|---|
| 1 | Goplus Rolling Tool Chest, 5-Drawer Tool Box Organizer w/Lockable Wheels & Sliding Drawers & Detachable Top & Adjustable Shelf, Tool Storage Cabinet for Garage Workshop (Red+Black) |

|
| 2 | Goplus Rolling Tool Chest, 5-Drawer Tool Box Organizer w/Lockable Wheels & Sliding Drawers & Detachable Top & Adjustable Shelf, Tool Storage Cabinet for Garage Workshop(Gray) |
|
| 3 | IRIS USA Screw Tool Organizer Small Parts Cabinet, 44-Drawer, Electronics Hardware Nuts and Bolts Plastic Storage Drawers Garage Storage, Stackable Bead Craft Organizer Building Bricks Sorter, Black |
|
| 4 | Keter Stack-n-Roll Modular Tools Organizer for Garage Storage and DIY, 3 Piece Resin Rolling Tool Box System for Small Parts, Black |
|
| 5 | Workington Portable Metal Tool Chest with 6 Drawers, 24" 6-Drawer Tool Chest Cabinet with Ball Bearing Drawer Slides, Steel Tool Storage Box Organizer 4005 Black |
|
| 6 | Workington Portable Metal Tool Chest with 9 Drawers, 24" 9-Drawer Tool Chest Cabinet with Ball Bearing Drawer Slides, Steel Tool Storage Box Organizer 4006 Black |
|
| 7 | Workington Professional Industrial Portable Metal Tool Chest with 6 Drawers, 26" 6-Drawer Tool Chest Cabinet with Ball Bearing Drawer Slides, Steel Tool Storage Box Organizer 4015 Black |
|
| 8 | Goplus 5-Drawer Rolling Tool Chest, Tool Storage Box, Removable Tool Cabinet, Sliding Metal Organizer w/Lockable Drawers (Classic Black) |
|
| 9 | Road DAWG ATBT1204D-BLACK Torin Rolling Garage Workshop Tool Organizer: Detachable 4 Drawer Tool Chest with Large Storage Cabinet and Adjustable Shelf, Black |
|
| 10 | Goplus Rolling Tool Chest, 5-Drawer Tool Box Organizer w/Lockable Wheels & Sliding Drawers & Detachable Top & Adjustable Shelf, Tool Storage Cabinet for Garage Workshop (Blue) |
|
For a metal tool chest, enamel-based paints or epoxy paints are generally best. They offer excellent durability, resistance to chipping, and can withstand the typical wear and tear of a workshop environment. Look for paints specifically formulated for metal surfaces.
How do I remove deep rust from my tool chest?
For deep rust, you might need more than just a wire brush. Consider using a chemical rust remover, which dissolves the rust, or a rust converter, which chemically transforms the rust into a stable, paintable surface. Mechanical methods like sanding with an orbital sander or even a grinder for severe spots can also be effective.
Is it really necessary to use primer when painting a rusty tool chest?
Yes, using a rust-inhibiting or epoxy primer is absolutely necessary when painting a rusty steel tool chest. The primer creates a protective barrier against future rust, improves adhesion of the topcoat, and provides a uniform surface for a professional-looking finish.
How long should I let the paint dry before using my tool chest?
While the paint may feel dry to the touch within a few hours, it’s crucial to allow adequate “curing” time for the paint to fully harden and achieve maximum durability. This typically means waiting 24-48 hours, or even longer for epoxy paints, before reattaching hardware or putting tools back into the chest.
Can I paint over existing paint on my tool chest?
You can paint over existing paint, but only if the old paint is in good condition, firmly adhered, and not flaking. You should still clean and degrease the surface thoroughly, and lightly scuff sand it with fine-grit sandpaper (220-320 grit) to create a mechanical bond for the new paint. If the old paint is peeling or damaged, it’s best to remove it first.
How to Paint a Rusty Steel Tool Chest
Transform your old, rusty steel tool chest into a vibrant, functional piece by following these steps for proper preparation, priming, and painting.
Empty the tool chest and remove all hardware. Clean the chest thoroughly with a degreaser. For light rust, use a wire brush or 80-120 grit sandpaper; for deep rust, apply a chemical rust remover or converter. Finish by sanding with 220-320 grit sandpaper and wiping with a tack cloth.
Choose a rust-inhibiting or epoxy primer for metal. Apply two thin, even coats, allowing recommended drying time between each. Ensure complete coverage, especially in corners and seams. Lightly scuff the dried primer with 400 grit sandpaper and clean with a tack cloth.
Select an enamel-based or epoxy paint designed for metal. Apply several thin, even coats, maintaining a wet edge if brushing or using smooth, overlapping passes if spraying. Allow adequate drying time between coats, typically several hours as per manufacturer instructions.
For added durability, apply a clear coat in thin, even layers, allowing sufficient drying time. Once all paint layers are fully cured (24-48 hours or more), carefully reattach all hardware. Consider oiling hinges and adding drawer liners for a complete finish.
Get our weekly buyer guide
Practical specs, not advice. Unsubscribe anytime.
This DIY project was exactly what I needed for my workshop. The emphasis on safety measures, like wearing gloves and safety glasses, was a good reminder. I spent about two days on it, just like the post mentioned, and my old steel chest looks amazing. It feels good to protect my tools in something that actually looks good now.
Fantastic guide! I had an old, beat-up tool chest that was an eyesore in my garage. The detailed steps on rust removal and applying the primer were spot on. I used an epoxy paint as suggested, and the finish is incredibly durable. It really does look like a brand new chest, and I saved a ton of money not having to buy a replacement.
I followed the guide for painting my old Craftsman chest and it turned out great. The rust-inhibiting primer made a huge difference, and I really appreciate the tip about using enamel paint for the topcoat. It took me a solid weekend, mostly waiting for things to dry, but it was worth it to bring my chest back to life. My tools are much happier now.
The instructions were pretty clear, especially on the surface preparation. My only complaint is that the guide didn’t emphasize enough how messy the rust removal part can be. I wish I’d laid down more tarps. Otherwise, the chest looks decent, definitely better than before, but it was a bigger cleanup job than I anticipated.